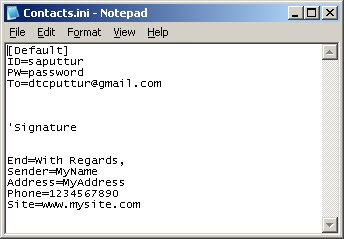
 Glink contains two files :Glink.exe and Contacts.ini
Steps to send Daily Account data easily:
Step1:Download the zip file and extract the file. You will get Glink Folder and Installer.exe. Execute Installer.exe. This will install Glink in your system and create shortcut to Desktop.
Step2:Edit Contacts.ini

ID=your email id without @gmail.com
PW=Your email password.
To=Your HO email id.Here use complete ID
Signature:
End=With regards
Sender=Your Name
Address=Your Office Name-Pincode
Phone=Office Phone No.
Site=Can be Blank if you have no site.
Step3:
Execute Glink. It will Create a folder in C:\ by name DailyAccount. Close Glink.
Step4:
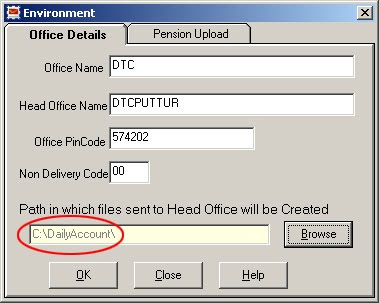
Login as Supervisor in Treasury module. Select menu-SubOffice-Environment
In the opened window,select OfficeDetails tab.
Edit the 'Path in which files sent to Head Office will be created' by clicking Browse button and selecting the folder C:\DailyAccount.
In the opened window,select OfficeDetails tab.
Edit the 'Path in which files sent to Head Office will be created' by clicking Browse button and selecting the folder C:\DailyAccount.

Hereafter,the data will be generated in C:\DailyAccount. Right click the daily account data folder and select send to compressed folder.
Step5:
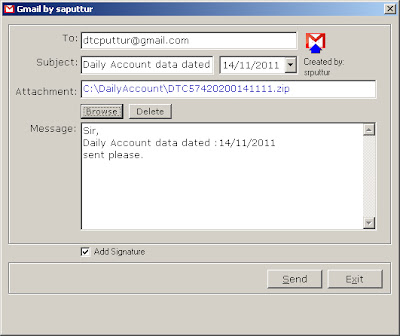
Run Glink
Select the zipped file by clicking browse button.Click Send.
 The following message will be displayed which indicates that the data is successfully sent.
 Click below button to download Glink updated version.


0 comments:
Post a Comment